Showing posts with label Airbrush. Show all posts

12.14.2012

New White Helmet Technique

I found the time earlier in the week to sit down and work on my white helmet technique. As I mentioned in a prior post, I'm looking at ways to use my airbrush more often, but the initial experiments didn't work all that well with white. The helmets I tested my theories on lacked definition and contrast.
One of my potential solutions was to finish them by hand, instead of zenithal work with the airbrush.
Here's the result of the hand painting over the airbrushed helmet:
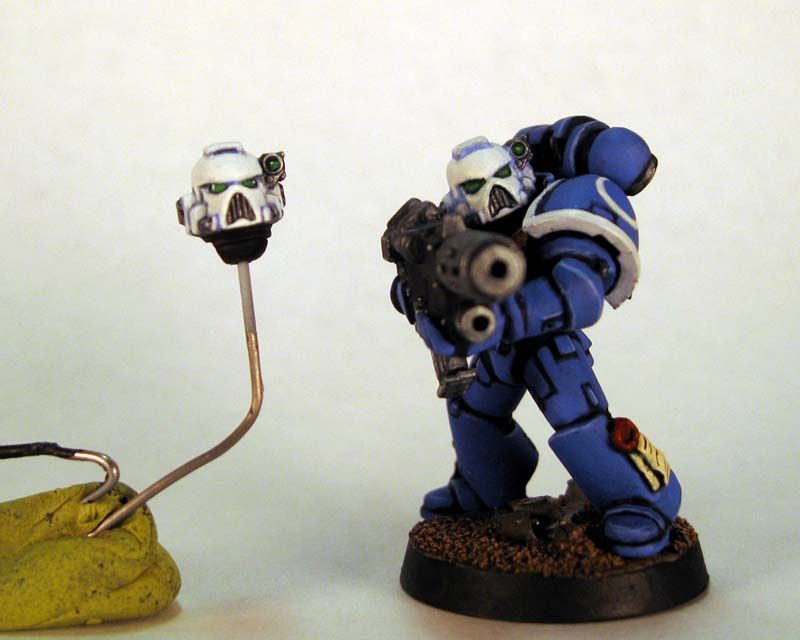
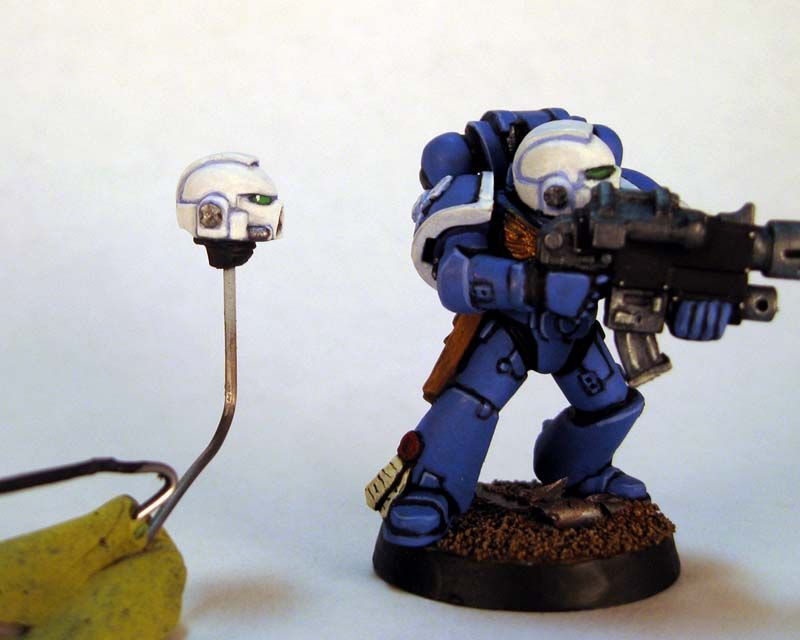

I'm thrilled with it, honestly. There's contrast, but it's not cartoony. Details are crisper, and the white is smoother and more vibrant.
How did I get this effect?
I first applied a wash of very thin Reaper Master Series 'Ultramarine Highlight'. However, I simply couldn't get the wash to stay in the seams of the helmet. I was using water to thin, and it just wasn't working. Then I dug out my unused bottle of Winsor and Newton Flow Improver. I've had this stuff for years and never used it.
I loaded a spare brush with some of the liquid, and made a small pool of it on my palette. I then loaded my brush with the medium, and thinned a small section of the Ultramarine Highlight paint. I picked that up in the brush and used it as my wash.
It immediately clung to the seams in the helmet, as you can see above. The process was messy, so all of the other surfaces had a tint of blue as well. I gave it two or three goings-over before allowing it to dry.
I went back over the helmet with more thinned white after the wash had dried, cutting the color back to the thin lines you see above. I then hit the metallic areas using MSP Shadowed Steel, Badab Black wash, more Shadowed Steel, then Hones Steel, and finally Polished Silver.
I also reworked my eye lens colors. I used to use MSP Pine Green, Leaf Green, and Pale Green from the Warm Greens Triad. Instead, I used MSP Forest Green, Grass Green, and Jade Green from the Cool Greens Triad, plus a white dot for a lens effect. I applied the same to the targeter.

All in all, I'd say it's a definite improvement and a total success. I'm thinking that maybe all airbrush, all the time just isn't going to work for me. I think I'm going to end up doing my majority of colors using the airbrush, but going back with washes to fill details and contrast and then cutting back the washes with my main color.

I also took a few minutes to put together the Marine's eventual bolter:
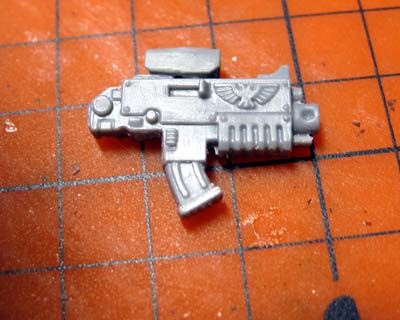
It's a targeter from the IG Heavy Weapons sprue on a regular bolter. It took a lot of fiddling to put on, as the underside of that tiny targeter bit is sloped some and makes it want to point downward. It's supposed to look like an ACOG sight. I think I need to file off the iron sight at the front of the bolter, though. What do you think?
I'm also considering cutting off the sickle magazine and replacing it with a box magazine from a Black Reach Terminator's storm bolter arm. I have enough to choke a horse, so sacrificing a few for Sternguard isn't a huge deal. Good idea, or leave it as-is?

12.06.2012

Airbrushing White Helmets

I managed to find the time to start on my airbrushed Sternguard experiment. I'd cleaned and mounted the heads for five models earlier, so on Tuesday afternoon I primed and painted those five heads.
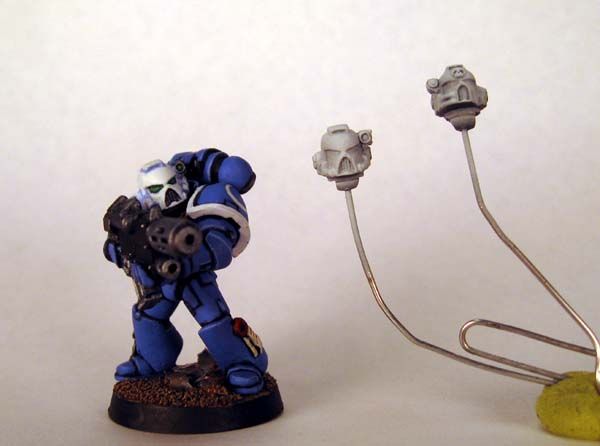
I primed in black, and then applied a full coat of Reaper Master Series 'Rainy Grey' (essentially the equivalent of Codex Grey). I then applied a coat of MSP Ghost White at about a 30 degree angle. It covered nicely, but didn't leave much grey behind at that angle. Just a bit under the bottom lip of the helmets. I then applied Pure White at about a 60 degree angle.
I had a really tough time telling whether the paint was covering properly due to the lack of contrast between the Ghost White and the Pure White. Ghost White is a slightly blue-tinted white, but it's not starkly blue against pure white. So, I kept spraying pure white over and over. I kept seeing small grey splotches under the white, and in hindsight, i think that was because I'd used the same water to thin the white and grey as I'd used to thin primer and olive green. Dummy mistake!

Here's how things turned out:


The completed model is my only existing Sternguard model, and I painted him quite a while ago. I think he was the first model I ever painted with white parts, at least in my Ultramarine army. I'd painted white on other types of models in the past.
You'll probably notice that I used blue as a shade color for the white. It's a super-thinned coat of MSP Ultramarine Highlight, the same color as his armor. It provides a nice bit of contrast and delineation of the white armor parts.
As for the color difference between the two sprayed helmets, I blame that on my lighting. I think my lights were angled a little too far to the left, and that right-side helmet got left partially in shadow, or at least not in the direct lighting path.

I'm not sure how I feel about the new method. On one hand, the white is nice and smooth. On the other, it lacks any real contrast. While the completed, old model isn't perfect, it at least has definition. However, the delineation between the white and blue is a little too stark, and it ends up looking a bit cartoony.
One big hurdle I'm facing is applying white to other parts of the models. My Terminators all have white chest eagles, and I was thinking of doing the same for my Sternguard. I'm not sure details like aquila wings and Crux Terminatus skulls will look right without that deep contrast.
I feel I have a handful of options going forward:

1) Use the helmets as they are. Maybe they'll perk up a little when I paint the targeters, grilles, and lenses.
2) Apply my existing blue glaze method to the helmets as they are, then respray with Pure White. This might help the model more closely match my old style.
3) Apply my existing blue glaze method, and then reapply Pure White with a brush for better control and to make sure I don't "erase" the blue with the sprayed white.
4) Strip these heads, start over, and go for a black primer, then blue, then white. This might allow more blue to appear than simply glazing would.
5) Go back to my hand painting method, and only airbrush the blue armor parts of the model.

At this point I really have no idea which direction to go in.