Showing posts with label Decals/Transfers. Show all posts

9.16.2016

Assault Squad WIP 2, Decals

Assault Squad Cyrax is nearly done. I'm at the decal stage, after which only basing is left. This is what the squad-side shoulder pads look like on each Marine:


Raven Guard Fast Attack Pad
Raven Guard Sergeant Fast Attack Pad
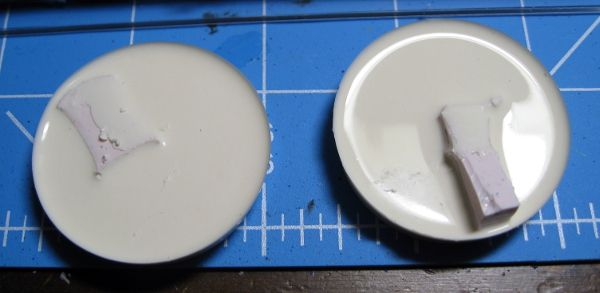
You'll notice that the pad is very shiny. That's the gloss varnish I use before applying decals to avoid air bubbles and silvering. Silvering is where the translucent decal paper around the design becomes apparent and ruins the effect of the decal. The gloss varnish, combined with Micro Sol and Micro Set, eliminates that.
I used to despise decals when I was first learning to paint my Ultramarines. I tried using an old set of Third Edition decals on my first ever Ultramarine model (a sergeant). I only used water, and the decals were so bad I had to scrub them all off and repaint the shoulders. I switched to freehand for years, up until I started Raven Guard and realized I would never be able to freehand the Chapter symbol. Ever.
I managed to score a full, untouched sheet of Forgeworld Raven Guard decals. I got them secondhand, as FW no longer produces this nice set. The current Legion sheet for 30K is worthless for 40K models. The Forgeworld sheet is very nice and has a ton of symbols and numbers of all sizes.
The Fast Attack squad symbols are actually straight off the regular GW Space Marine decal sheet. They applied nicely after I cut slits between each arrow. This allowed them to sit flat on the curved surface. After they had dried overnight, I glossed lightly over them. I allowed another night's drying for the varnish and today I layered the black squad numbers over top of them. Layering decals works very nicely as long as you gloss varnish between layers. I wouldn't put too many layers though, or you risk a big, thick area of varnish.
The shiny finish is easily knocked back down to matte using Testor's Dullcote.
 
I also found some time to start assembling a Harlequin Troupe. Six models in the unit. The only thing I've done so far is assemble the legs. These things are so foreign to me after working with Marines for so long.
harlequin leg bits assembled
Harlequin legs, so dainty!
After looking at the instruction sheet and assembling the legs, I felt a little disappointed that there will only ever be six poses in my entire force. But then I realized that that is actually more or the same variation than there is in most Marine armies that use the older kits. When I combine the swappable torsos, arms, and masks among the units, I think it'll be fine. I can also always try to get some of the most recent metal/Finecast models (not the ancient ones) to provide some tiny variations as well.
I think this will be a great army to build and paint.

As a final note, you'll notice that I've started adding captions, title, and alt text to my images after reading a great article over at Broken Paintbrush. I'm also loading my images directly to Blogger instead of hosting them on Photobucket. Photobucket has become nearly unusable for me due to all the ads and scripts. I opened the Photobucket page an HOUR ago and it's still not loaded properly. Does anyone know if there are any down sides to hosting images with Blogger?

4.26.2015

More Raven Guard Scout Progress...So Close!

Here's a series of images that show my progress on the Raven Guard Scouts.

This image is washed out and terrible, but you can see the glossiness of the varnish I added to the shoulder pads. I'm told it's a key step in laying a foundation for decals, so I applied it to the shoulders of every model.

Once that was dry, I started applying decals. I used Micro Sol and Micro Set to get them nicely adhered. The first I applied didn't go very well, as I mixed up the order of the solutions. You want Set, then Sol. Set makes the area tacky so the decal "sets" in place, and then you use Sol to soften the decal to conform to the shape of the piece. It's a SOL-vent. After I figured that out, the remaining decals went quick and easy.

I used the Forgeworld decal sheet for Raven Guard, which is absolutely fantastic. I'd say you could probably do an entire army with a single sheet.

I then set the models aside after giving them a quick blast of Dullcote to lock down the decals, and proceeded to work on making a mold for my custom paver/flagstone bases. I dug out a very old canister of mold silicone. I'd had the kit for something like two or three years, and the canister was half full. When I went to use it, I realized it was probably no good because the silicone was very thick and goopy. Proper silicone is thick but flows easily. Being the cheapskate I am, I figured I would give it a shot anyways and mixed up a batch.
Turns out I was right, the stuff was too far gone. It refused to cure after three full days. Uncured mold silicone is just about impossible to remove from anything, so I had to throw the mold box, the acrylic sheet I'd glued it to, as well as four master bases in the trash. Here's a pic of the whole disaster before it went in the trash. The bases sticking out of the top were actually pulled free from the hot glue I'd used to fix them to the acrylic sheet because of the air bubbles underneath!

I thought about giving up on making a mold, as I wasn't sure I wanted to spend more money on more silicone. But, I gave in and bought more. This time I bought Alumilite Quick Set, where in the past I'd used High Strength 2. The Quick Set cures more rigid and less squishy. HS2 is more for one-piece molds with big undercuts, while Quick Set is for two-piece molds and one-piece molds with no undercuts.

I got my shipment in less than a week, and poured a mold over four of my masters. The result? Success!

One thing I'm a big fan of when I make molds is recycling. In the past, I'd saved small spills and sections of cured silicone and added them to my new molds. Silicone cures solidly to old silicone, which is why you need mold release agent when making two-piece molds. But I wasn't sure if Quick Set would bond to HS2, so I didn't include any recycled chunks in the master mold. Instead, I sliced off a couple pieces of an old HS2 mold and put them in the bottom of some plastic cups. I poured the leftover Quick Set into the cups to see what would happen. Turns out they bond nicely! I can now use chunks of old molds to save volume when pouring new molds. I even added these two little experiments to my pile of old silicone for chopping up and inclusion in new molds down the road.

My first pour into the new mold wasn't great, but it wasn't a total failure. Below you'll see four bases. The top right contains a lot of unmixed resin, while the top left contains a little less. I didn't spend long enough stirring the bottom of the cup. The two casts on the bottom came out perfectly, as they were the first ones poured from the cup.

 After another mix and pour, I had six usable bases and two failures. Here are the five for the Scouts:

Because pure, flat bases are boring, I got out my tubs of sand and small rock and added some to each base to make them look like small rubble piles.

These will then be primed white and painted a stone grey color. You'll notice the bottom left base has a small notch out of the largest tile section, at the bottom. That was an air bubble from the casting that I carved the edges of to make it look like wear or damage. You don't have to worry too much about bubbles on bases of this style, since you can just cover them up with sand and rock, or expand them into cracks or damage.