Showing posts with label Landspeeder. Show all posts

8.17.2017

Ye Olde Landspeeder Assembly


My goodness! It's been just shy of two months since I've had anything to say about 40K. This has been a very busy summer here on the farm, which is great for business and not so great for hobbying.

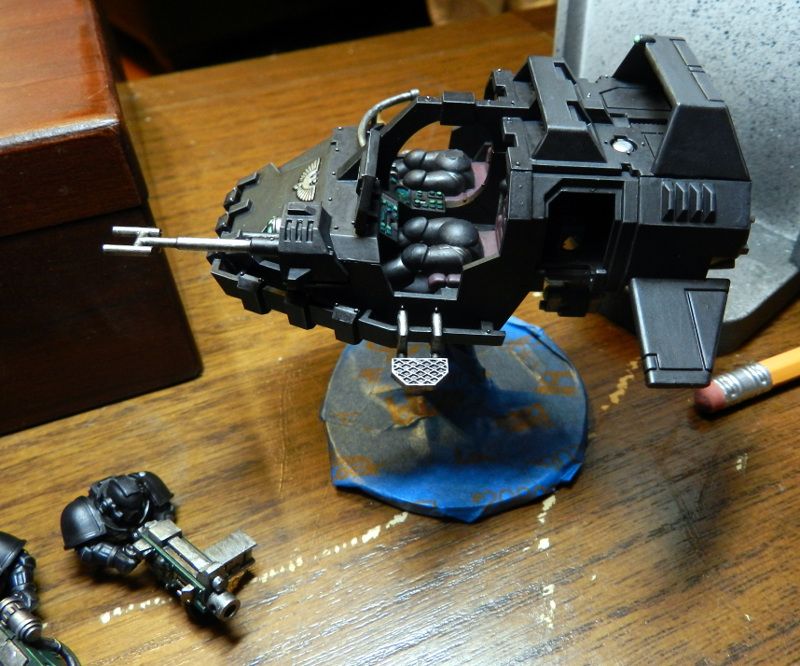
I've just been picking away at my trio of Landspeeders this whole summer, and am finally ready to start assembling the main bodies after magnetizing everything and painting the pilots and heavy bolter gunners. The multimelta gunners are still a work in progress.

Over the course of building these old, Third Edition speeders I figured out a few tricks that might help someone else that ends up with one. They're pretty common to find on eBay, and the kit is a bear to assemble when compared with the current version of the sprues.

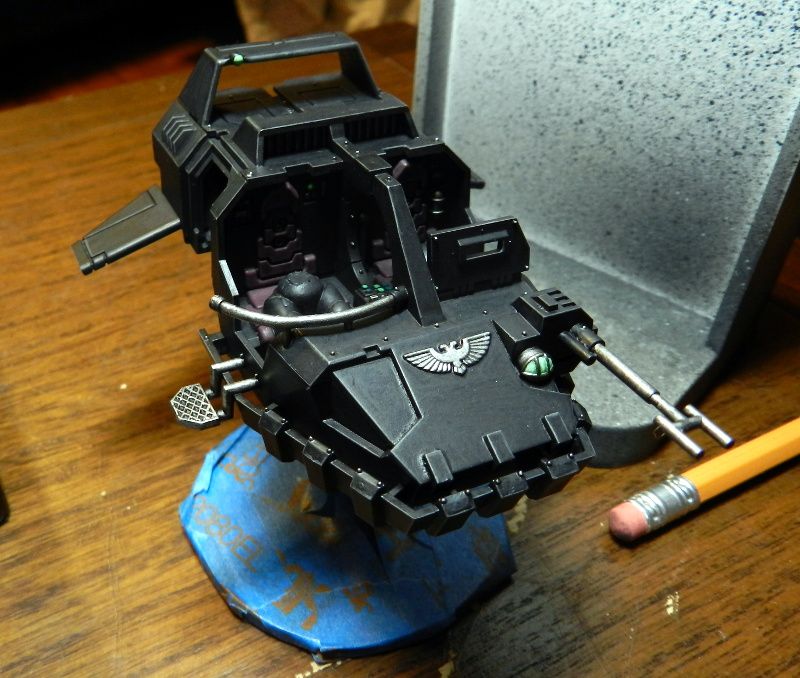
The biggest problem you find with these Speeders is that the top half and the bottom half tend to warp a bit in the front-to-back dimension, meaning the middle rarely closes cleanly. This seems to be the fault of the crew chair assembly. If you look at the picture below, where the chair is not glued in, the gaps are manageable.
But once you add the crew seats, things get all wonky.
 
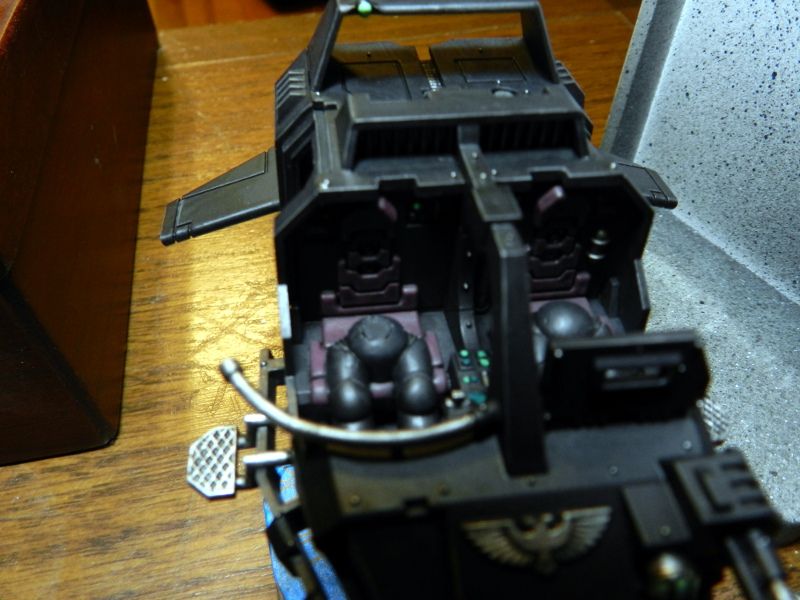
Obviously, the seat assembly is a little too large in certain areas. So, break out the files and start filing slightly at each of the locations marked in the images below:
Get the groove above the seats, the top of the dash, and the top of the air intake.
File the sides of the seat back piece and the sides of the seats themselves.
You also want to make sure the seat assembly sits flat in the bottom of the hull. The best place to check is the gap just below where the doors would attach, near that textured diamond plate section.
After all that filing is done, your gaps will be a little more manageable...
 ...until you try to glue it together. You're going to need a lot of clamps!

You'll notice I have one clamp pressing down just behind the angled air intake on the roof (far left Irwin clamp). This one provides top-to-bottom pressure and ensures the back section is glued flush. You can make sure by looking in the back of the chassis and making sure the pieces have no gaps. Sorry, I didn't get a good picture of that part.

The center Irwin clamp is pressing the sides in. If you exert too much pressure on the top-to-bottom clamp, the middle likes to bow outward.

The red and silver clamp on the right holds the nose section together in a top-to-bottom direction.

And finally, there's that pink rubber band pulling from the dash area to the lower nose. This pulls the seam below the dash laterally to close that gap. Because you cant get a band in there normally because of the center cockpit support, you have to pass the band through the cockpit and pull both ends toward the nose. Then put a pen or something (I used that purple sculpting tool) through both ends and twist it to provide torsion or tension or whatever to close up the gap.

You can probably understand why GW had this kit retooled. The modern version is a million times easier to assemble without gaps. My three Speeders didn't come out without any gaps, so I have to get some Liquid Greenstuff to fill them in and file smooth. I might try the "sprue slurry" method as well. It's where you melt some sprue shavings with liquid cement and spread the goop in the gaps, let dry, and then file smooth.

One final tip, that really should have come first is that you want to assemble as LITTLE AS POSSIBLE before gluing the halves together. Don't glue the rear airfoil on the roof, the gun rail, the pilot shield, or even the little mast thing that sticks out of the bottom. I made the mistake of doing so and all of those pieces get in the way of clamps and rubber bands and WILL break if you're not incredibly careful. You only get one of each piece in a kit, so there's no spares if you snap off the gun rail or crush the rear airfoil.

Honestly, I'm probably never going to build another of these old Landspeeders again unless I get an insane deal on one (like five dollars each kinda insane). They don't come with all the available guns (no Typhoon launchers and no nose guns), and take so much additional effort to build that it's probably worth the extra money for the modern kit. But if one crash lands in your lap, now you know how to make the process slightly more bearable.

I hope to have these suckers primed and paintable in the next several days. If I use the sprue slurry method to fill gaps, I'll do my best to document the process.


6.09.2017

Another Assault Squad

I've been finding bits of time here and there at night after farm stuff is done to paint more Raven Guard. I, like many others, have gotten a bit of a motivational jolt after seeing how 8th Edition will work.
The squad is just five Marines for now, sergeant with a power sword and two Marines with flamers.


I'd decided on the weaponry before 8th was announced, and thankfully it's still a respectable setup in the new edition.
I had a couple issues with the Raven Guard chapter decals, as I always seem to. On this batch, some of the edges near the ravens' heads flaked off and they were sealed before I noticed it. Oops.
I used the new ASM torsos for all of the models, and the legs for three of them. I really like the legs for the new kit, as they have a nice variety of poses (the old one had two, if I remember right) and the feet have a larger surface area for gluing to bases. The old ones were like trying to glue two pin heads together.
I have the flamer Marines old style standing legs and metal jump packs. The combination allowed me to use up some old bits and keep the models stable while doing so. When I'd used metal jump packs on my Ultramarines on top of running legs, they were prone to breaking and tipping.

The squad will get another five models in the future, one of which will have an eviscerator. 8th makes almost every weapon option worth taking now in one situation or another! ASM as a whole still look like fun in the new edition, which makes me happy. The only thing I'm not happy about is the cost of all the new books I'll need to run all my models (core, Imperium 1, and FW Index Imperium). I had pegged that cash for a Stormraven or some Stormtalons, but now it goes to books. That just means I'll be going back into the hoard to paint models I already have unbuilt and unpainted. 

Here's a little phone picture peek at what's next on the table:

Yeah. three more Landspeeders. Unfortunately, they're the old version with the single piece top. Total pain to assemble, but I figured out some tips (beyond "clamp heavily") that might help anyone who's still sitting on some of these. I'll share those when I've properly documented the processes. I've also got to find a trio of Typhoon Launchers, assault cannons, and heavy flamers at some point, as these old kits didn't have those options.

1.04.2016

Raven Guard Landspeeder

The second unit in my Raven Guard army is complete! Here is my first Raven Guard Landspeeder:


The model is fully magnetized for all weapon loadouts. The gunner is removable at the waist, and the Typhoon launchers and doors are magnetized inside the housing. The nose guns attach with magnets inside the gun mounts.

You will probably notice some very inconsistent black on the model. I had never used Nuln Oil/Badab Black on a large model with flat surfaces before, and I ended up with some splotchy areas that I tried to repair by repainting my primary color and then washing again. I thought it helped, but when I sealed the model with Dullcote, all the repaired areas reappeared. I tried like mad to fix it with another coat, but eventually gave up. It's not blatantly obvious at normal viewing distance, and certainly not on the tabletop, so I'm chalking it up as a learning experience. Better luck next time.

The decals were a bit of a bitch to get on. I'd used Forgeworld transfers on my Scout Squad, and had little major trouble with them. The decals on the Marines' shoulders were an absolute bear to get to lay flat, despite slicing the decals slightly at the fold points and using liberal amounts of Microset and Microsol over a gloss varnish on the decal locations.

I did learn that you have to be very careful with how much gloss varnish you apply over the decal areas. If you just apply a little puddle where the decal will be, you may end up with lines around the decal where the varnish sits above the paint. It's like a little plateau. Dullcote hides it some, but it appears to be smarter to varnish entire panels of the model, despite the decal being only on one piece of the panel. That way you don't get the plateau. And certainly never touch the varnish with a brush because you think it's too thick and you need to spread it out. I did that on the area the Chapter symbol is located on the nose, and I ruined the surface of the varnish and had to reapply more. Now I have a plateau with a crater in the middle.

The big numbers on the wings indicate squadron and vehicle numbers. The large number on the speeder's left wing is squadron, and the small one on the right wing is vehicle. I figured it would be much easier to keep track of which speeders belong to which unit, and therefore which models have which special rules, if I numbered them in a coherent way. My plans include multiple formations that use Landspeeders, so keeping them organized is important for and my opponents. I don't want to accidentally nominate targets for a Suppression Force with a Speeder that's actually part of a Stormbringer Squadron.

I'm pretty happy with the model, despite the mistakes I made and the problems I ran into. They're such great models and units on the table.

I have my Captain mostly built. I just need to put some Greenstuff in the neck joint of the Forgeworld Korvydae model I used as the torso/legs, and then I'll mount him for priming and painting.

12.03.2015

In Progress: Raven Guard Landspeeder

It's always satisfying and motivational for me when I can share actual progress on painted models, so today I have some shots of the Raven Guard Landspeeder I'm working on as part of my Shadow Force formation.


Nothing super fancy, but this section of the speeder is just about done. I assembled this section in two sub assemblies, the top hull plate and the bottom and sides. They were primed separately, and then I painted all of the interior of the cockpit before assembling them together and then painting the exterior.
You might notice that the seats are a purplish color. It was originally supposed to be a reddish color (Reaper MSP Red Brick), but it kept coming out pink. After a wash with Badab Black/Nuln Oil, it's a nice purple that looks nice alongside the green of the console and gun casings and the black armor.
 
I'm still working on the Typhoon launchers, Tornado nose guns, side panel doors (that are used when the Typhoons are not), and the pilot. The Typhoon launchers and panel doors had some deep pits in the plastic from where the sprue was clipped off. When I filed the nubs down, there were air bubbles inside the point where the sprue and part met. It's pretty typical of injection molding, I think. I tried to prime over them, as sometimes primer will "skin" over small holes, but these were too big. I was waiting to buy some Liquid Greenstuff to fill the holes, but decided to use a slurry of sprue shavings and liquid cement. The parts were drying last night, so hopefully I can get them filed and primed tonight.
 
After this model is complete, I will be working on my Captain. I'm short on fancy HQ-style bits, so I think I'm going to crack open one of the three limited edition Web Store captains I have kicking around. I'm torn between going for the typical Raven Guard Captain with dual claws and a jump pack, or something more basic like powerfist and bolter. The question basically boils down to whether I want him to join the Vanguard or the Sternguard in games. I'm leaning toward Sternguard.