Showing posts with label Modeling. Show all posts

8.17.2017

Ye Olde Landspeeder Assembly


My goodness! It's been just shy of two months since I've had anything to say about 40K. This has been a very busy summer here on the farm, which is great for business and not so great for hobbying.

I've just been picking away at my trio of Landspeeders this whole summer, and am finally ready to start assembling the main bodies after magnetizing everything and painting the pilots and heavy bolter gunners. The multimelta gunners are still a work in progress.

Over the course of building these old, Third Edition speeders I figured out a few tricks that might help someone else that ends up with one. They're pretty common to find on eBay, and the kit is a bear to assemble when compared with the current version of the sprues.

The biggest problem you find with these Speeders is that the top half and the bottom half tend to warp a bit in the front-to-back dimension, meaning the middle rarely closes cleanly. This seems to be the fault of the crew chair assembly. If you look at the picture below, where the chair is not glued in, the gaps are manageable.
But once you add the crew seats, things get all wonky.
 
Obviously, the seat assembly is a little too large in certain areas. So, break out the files and start filing slightly at each of the locations marked in the images below:
Get the groove above the seats, the top of the dash, and the top of the air intake.
File the sides of the seat back piece and the sides of the seats themselves.
You also want to make sure the seat assembly sits flat in the bottom of the hull. The best place to check is the gap just below where the doors would attach, near that textured diamond plate section.
After all that filing is done, your gaps will be a little more manageable...
 ...until you try to glue it together. You're going to need a lot of clamps!

You'll notice I have one clamp pressing down just behind the angled air intake on the roof (far left Irwin clamp). This one provides top-to-bottom pressure and ensures the back section is glued flush. You can make sure by looking in the back of the chassis and making sure the pieces have no gaps. Sorry, I didn't get a good picture of that part.

The center Irwin clamp is pressing the sides in. If you exert too much pressure on the top-to-bottom clamp, the middle likes to bow outward.

The red and silver clamp on the right holds the nose section together in a top-to-bottom direction.

And finally, there's that pink rubber band pulling from the dash area to the lower nose. This pulls the seam below the dash laterally to close that gap. Because you cant get a band in there normally because of the center cockpit support, you have to pass the band through the cockpit and pull both ends toward the nose. Then put a pen or something (I used that purple sculpting tool) through both ends and twist it to provide torsion or tension or whatever to close up the gap.

You can probably understand why GW had this kit retooled. The modern version is a million times easier to assemble without gaps. My three Speeders didn't come out without any gaps, so I have to get some Liquid Greenstuff to fill them in and file smooth. I might try the "sprue slurry" method as well. It's where you melt some sprue shavings with liquid cement and spread the goop in the gaps, let dry, and then file smooth.

One final tip, that really should have come first is that you want to assemble as LITTLE AS POSSIBLE before gluing the halves together. Don't glue the rear airfoil on the roof, the gun rail, the pilot shield, or even the little mast thing that sticks out of the bottom. I made the mistake of doing so and all of those pieces get in the way of clamps and rubber bands and WILL break if you're not incredibly careful. You only get one of each piece in a kit, so there's no spares if you snap off the gun rail or crush the rear airfoil.

Honestly, I'm probably never going to build another of these old Landspeeders again unless I get an insane deal on one (like five dollars each kinda insane). They don't come with all the available guns (no Typhoon launchers and no nose guns), and take so much additional effort to build that it's probably worth the extra money for the modern kit. But if one crash lands in your lap, now you know how to make the process slightly more bearable.

I hope to have these suckers primed and paintable in the next several days. If I use the sprue slurry method to fill gaps, I'll do my best to document the process.


10.07.2016

Dreadtober Progress Report #1: The Build

As I mentioned last time, I signed up for Dreadtober this year. It's my first time taking part in a blogosphere challenge, though I had made painting vows at the Bolter and Chainsword 5+ years ago.

I challenged myself to build and paint a magnetized Raven Guard Venerable Dreadnought by the end of the month. I love Dreads in general (also, Terminators), and the VenDread kit is dirt cheap on ebay because of all the folks splitting up Death Masque box sets.

I wanted to fully magnetize the arms on the model, as I did the first time I built the kit for my Ultramarines. However, I specifically wanted to avoid using any of the parts I used last time to make it more interesting to paint.

Here's the build as it stood yesterday morning:

Raven Guard Venerable Dreadnought

I selected the lascannon arm from the kit, and added a spare missile launcher from my bits box. I sank 1/4 inch magnets into the arms and the shoulders. I'll build and paint the rest of the possible armaments some other time.

The Body

Raven Guard Venerable Dreadnought Sarcophagus
 
For this Raven Guard Dreadnought, I decided to select the bare glacis plates and sarcophagus. I wanted some nice, uninterrupted area to add decals and paint white. The majority of the model will be black and metals, so I wanted some white that would stand out no matter what arms I gave him on a given day. After test fitting the blank sarcophagus, I changed my mind and went with a more detailed version you see above. Making the whole front of the model plain felt like a waste of the Venerable kit and looked pretty uninteresting as a whole.
 
The left glacis plate will get an XIX (Raven Guard are the nineteenth Legion) decal and either a black skull or crux terminates design, over which will be placed a large purity seal for visual interest. The right plate will get the Chapter symbol. I've already added another couple purity seals on the body since taking this shot.
 

The Legs

 Raven Guard Venerable Dreadnought Leg Plates
 

These are the purity seals and leg plates I selected. The light seals are from the Forgeworld Captain Korvydae kit I used as the basis for Corben Beck, while the larger one is from the Land Raider Crusader accessory frame.

Honestly, I'm not a huge fan of the leg plates provided in the Venerable Dread kit. There is an alternative set than those pictured, but they're pointed at the top and look odd. I don't mind the right plate above, but the left one really irks me. It has molded-in text (Arx, Calth, Talassar, and Lost Hope). These are planets with which the Raven Guard have no affiliation. Why would a Raven Guard Dreadnought have the names of these planets carved into his armor plating? I can explain it away as a salvaged plate or some sort of Deathwatch service remnant, but I'd prefer not to. There is a nice, semi-fancy plate in the old Ravenwing Upgrade frame I could use, or I can just grab a plain one from the standard Dread kit. I've not glued these on yet, so there's still time to change my mind. Anyone have any suggestions for explaining away the pictured plate?
only left side option has script on it: Arx, Calth, Talassar, and Lost Hope. The Raven Guard weren't present at any of those planets during their destruction, so I have no idea how I'll explain it away. It bugs the hell out of me, but I didn't have any other options. Thankfully, I've not glued them on yet so if I manage to find a replacement before the end of the month, I can use that.
Anyone have any other suggestions for explaining why the above plate might appear on a Raven Guard Venerable Dreadnought?

The next step is to build the base to match the rest of my models. It'll involve cutting squares of plasticard, carving them, and then gluing them on the 60mm base to make flagstones. I very briefly thought about casting the result for reuse, but I don't think I'll use many more 60mm bases in my army.

11.15.2015

Standish Standoff 2015 After-Action, plus Additional Words on Things

Yesterday I attended the fifth annual Standish Standoff at the old FLGS, Crossroad Games. 1850 "semi-competitive" tourney, three rounds, with scores for battle, painting, and sportsmanship as well as a submission-based painting competition.

I put "semi-competitive" in quotes because while it's touted as such by the shop and the organizers every year, some folks abide by the spirit and some...don't.

I brought my Ultramarines on what I declared as their "swan song" as a primary force. Yes, I'm holding on to my Ultramarine models until I can subsume them with Raven Guard, but they'll never be the primary force for my army again. I'll expand on the reasons later in this post.
My list was a Demi Company made of a Captain and Command Squad in a Razorback, three ten-man Tacticals in Rhinos, a 10-man Assault Squad with jump packs, and a 10-man Devastator Squad with missiles. Joining that formation was a Strike Force Command formation of a 9-man Honour Guard unit with a banner, relic-bladed Champion. Half had swords, and half had axes. They were led by a Chaplain, and all rode in a drop pod. Nothing overwhelming, and nothing abusive. I didn't opt to min/max with 5-man squads in a metric assload of free transports, because I'm not a huge fan of 5-man squads, nor do I own any additional transport models.

My first game was against Orks, which I haven't seen on a table in a very long time. The list was several units of Tankbustas, Boyz, and Lootaz in Trukks, a unit of Grots, and several units of Bikerz. The core of the army was a massive unit of 14 Bikerz, joined by a Painboy and Warboss on bikes, all led by another special Warboss on a bike who gave them all Skilled Rider and Scout.
We duked it out for only two and a half turns until time was called, with the win going to the Orks. I was rusty and play terribly slow with such a high points level, so I think I lost sportsmanship points as a result.

Game Two was against Tyranids. I don't remember the exact makeup of the force. I just remember that he had no duplicate units, and had GENESTEALERS. That made my day, seeing Genestealers actually played and enjoyed. We got a full four turns before game end, tied, with the Nids player taking some additional points on secondary objectives.

My last game of the day was against a Krieg army heavy in infantry and artillery units, backed up by a Baneblade. I steamrolled a tired and seemingly uninterested opponent. It had been a loooong day. My Honour Guard killed 80% or more of the infantry in his army single-handedly, though I think he took a bit of a fascination in seeing how many men it would take to drown them in blood and body parts.

I did poorly in battle points, and had less than perfect sportsmanship points. That was a first for me, and stung the whole way home and a little of this morning until I realized it was likely because I was so damn slow in my play. Who knows? Less than half the field had perfect sports scores, which is a HUGE departure from all but the very first Standoff.

I was awarded Second Best Army, which was a collation of Painting, Sportsmanship, Pub Quiz, and Favorite Opponent votes. There was some low grumbling from various players regarding their paint scores in relation to others' scores, and I'll freely admit I had a couple grumbles of my own, but those grumbles have been there for each of the five years the event has run. Anything from "How did an army without 100% of its models fully painted get THAT score?!" to "That guy just uses airbrush and washes!" have been voiced over the years. I've had to judge painting personally on two or more occasions, and it is HARD to be consistent across a 40 point scale. So no shade thrown at the judges by me, just some bruised ego on my part.

I achieved the one goal I had for myself on the day though, that being winning the Best Painted Squad category in the painting competition with my Ultramarine Command Squad. Mission accomplished!

There is one huge, glaring lesson that I take from the Standoff though, and that is that the Space Marine Demi Company formation is the most boring thing that has ever bored a player. I've actually been running a list of that type for several years off an on, and I thought that with new rules that support the build it would be more fun. Wrong. So wrong. The Demi Company (and even moreso the Gladius built with a double Demi), is a big bag of yawns thrown in a river of suck. Does it win games? Yes, it does. Does it appeal to me any longer? Not on your life.

I sat down in each of my three games and explained to my opponents what the Demi did, and what all my Ultramarines Doctrines did, and I watched their eyes glaze over. As I lay in bed last night trying to sleep, I realized that an ObSec Marine with a bolter is the worst thing ever. It has no special skills, no interesting stats/attacks, etc. Its role on the field is to exist, take up space, and not die while either sitting inside a Rhino or moving around 6" at a time and taking cover or pot shots with a mediocre weapon. I don't want to aim to win my games simply by existing, I want to win them by outmaneuvering, attacking, falling back, and generally playing more cerebrally. Ultramarines in a Demi Company play and win by Mathhammer, and I hate Mathhammer.

So, I'll be bidding a fond farewell to my Ultramarines from here on out. I picked up my copy of Kauyon, and will be painting Raven Guard from this point on, no exceptions. Ok, maybe a couple exceptions for the Grey Knight Terminators I still have kicking around here someplace, as well as some Tempestus Scions I'd like to pick up to spice things up as allies to the Sons of Corax.

I had built a squad of five Raven Guard Tactical Marines to add to my existing Scout Squad. Here's a couple WIP shots of two of the squad members (excuse the poor pics, I've still not set up my painting desk and photo area since the move to the farm):


Originally, I wanted my RG to be city fighters. Guys who are posed dynamically like they're kicking in doors and clearing rooms. Lots of gear and pouches. I chopped the arms and leg joints on every squad member, reposing them ever so slightly here and there. The sergeant in the first two pics has his legs at new angles and elevations, and the other Marine is about to pull the mag from his bolter. another non-pictured model is high-stepping over some rubble. The models without standard studded pads got scratchbuilt ones made from old third edition pads with the rims filed down and microbeads drilled in as studs. Those five Marines took a week or more of time and energy just to chop and build, and they don't really look all that great to me. The sergeant is too thin in the waist area, and the bolter Marine's hand isn't quite right in its grip or spacing. The high-stepping Marine I mentioned looks unbalanced in his run, like some sort of Khorne Berserker model.
 
When you combine what I feel is a failed first effort at building chop-shopped Marines with the new focus given by the Kauyon book and my sudden loathing for ObSec Tactical Marines, I'm hitting rewind on the Raven Guard machine. The squad will go into a box, and instead I'm building a Land Speeder. There are six different formations in Kauyon that involve Land Speeders. I've had one sitting in a box since the kit was recut in Fifth Edition, so it'll be my starting point. I will either build the Raptor Wing (Speeders and Stormtalons), Shadow Force (Speeder, Captain, Vanguard, Sternguard), Speartip Strike (Speeders and Bikes/Attack Bikes/Scout Bikes), or Stormbringer Squadron (Speeders and Scouts with Speeder Storms). They all have neat rules, and I can't decide quite yet.
 
I'm newly excited about my Raven Guard thanks to the new things Kauyon lets me do with them, and thanks to the realization that I've hit my limit with Tactical Marines, ObSec, and Doctrine rerolls. here comes a new way to play, and it dresses in black!
 
Now I just have to figure out how to fund purchases of so many more Land Speeders...eBay bitz selloff?


2.20.2015

Raven Guard Sergeant Progress

Just a smallish update today. I spent a little time working on the Sergeant, roughing out the shapes of his hand and arm.
First I got the fingers laid out, and a small wad of Brown Stuff pushed into place for the general structure of his arm/elbow. I like this better than a wire skeleton, as I know I can just rip it out of there if I really hate it.


As you can see, really rough work, but I got the general shapes and dimensions in there. Then I started work on the arm/sleeve/elbow/whatever with Green Stuff, as it flows better than Brown Stuff. Brown Stuff is spectacular stuff, but it gets a little grainy when worked too much, and it's intended for sharp lines and sandable edges, instead of folds and curves.


This is where the Sergeant sits as of now. I need to go back in and file his fingers smooth and then patch any low areas with GS. The one thing that's really bugging me is the side-on view of the arm. In the picture immediately above this text, the elbow and bicep area look fine. But in the side-on shot, you can see that the arm looks a little...puffy. There's an unnatural angle to the area right behind the forearm cuff of the gauntlet.

Can anyone suggest a fix for this? It sort of looks like I need to point the gauntlet upward more or something. I can't quite figure out what the problem is, and how to fix it.

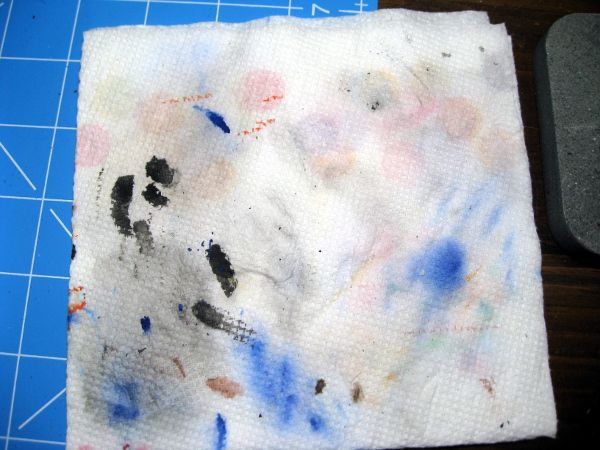
Oh, and because Khorne Inquisitor asked about on his blog, here's a picture of my blotting/wiping towel, though this one is relatively fresh.


2.11.2015

Revised Raven Guard Scouts

I have updated Raven Guard Scout models to share! After ripping some of the previous incarnations apart and reassembling, here's what I have:

The first model is the shotgunner, who is unchanged from last time. I just took a slightly better picture.

Second model now has a swapped combat blade and is throwing a grenade. The blade arm is a reclaimed bit. Stripped of a previous owner's sloppy Templars paint job.
 
 
The third Scout is unchanged, but here's a better picture.


Scout number four is the only model I left with the Scout Hug Syndrome, as it actually works in this pose. Pistol extended for a shot, with the swapped combat blade ready for a followup stab.


The Sergeant is unfinished, but he is the most ambitious model in the squad. I removed his powerfist entirely, replacing it with a pistol. I then gave him a WHFB scabbarded sword to serve as either a combat blade or a power sword as I see fit in my lists.


I'd thought about bitz-buying the hands from the Sniper box, intended to graft the hand holding a scope onto a spare arm. But I decided to be more daring and pose him with his hand resting on the sword's pommel. I grabbed another reclaimed arm from the same lot of models, and started cutting. I sliced off the forearm at the end of the armor section, and separated the shoulder pad from the bulk of the bicep. I then carved away the fingers from the hand, and bored a slight depression in the palm area. Using plastic glue, I attached the shoulder to the torso and the palm to the pommel and got this:


The next step is to build the core section of the arm/elbow with Brown Stuff. I just need a rigid center on which to add Green Stuff for the final cloth details. After that is done and set, I'll tackle the fingers.

10.07.2014

Command Squad Progress: the Tank Killer

In the last week or so, I've made some very solid progress on my Command Squad. Painting for the Standard Bearer is done except for his base, I've picked some parts for the bionic Veteran, and I fully built the tank-killing Veteran. Here are some shots of him:

This is the initial body construction, showing the FW torso defects I repaired and some studs I added to his knee pads.


And then his final state, with a head picked out and pads on.


The studs are micro beads, set into small drill holes and glued in place. You can see the tutorial I got the idea from over at Drowned in Plastic. While you're there, check out his Helbrecht build. It's AMAZING.
I held off on a full spread of studs, because I wasn't sure how well they'd come out. A couple added to break up the smooth lines just a bit felt like enough.

The general design behind him is that he wears plated Mk4 armor and a left-leading pad with an extended edge to protect him from the shrapnel and blast from tanks and bunkers he's destroyed with that meltagun and meltabombs (the meltabombs are behind his left hip, not visible in the images). He's got improved targeters in his helm for finding and tracking weak points in vehicle armor, including an upgraded thermal imaging suite for finding exhaust ports and venting seams in xenos and Imperial STC vehicle patterns.

I didn't elect to use another tabarded set of legs for this Marine, as I figured he'd either have no use for one as decoration or that it would be burned up pretty quickly as he stands in the blast wash from exploding tanks. It might bust up the cohesion of the squad some, but probably not a lot as the Apothecary and the bionic Veteran also do not have tabards (though the bionic one is still up in the air, with a post on him and his legs coming later this week).

It's exciting to be nearly done with the Command Squad as a whole. Once the Standard Bearer is done, I'll be over halfway finished, with only two guys left. Both are simpler paint jobs than the Standard Bearer or the Apothecary. The tank hunter will go pretty quickly, being all blue and gold and the bionic Marine will as well, since I don't forsee using any white or fancy sections on him.
Once the squad members are done I have to decide if I'll build them a custom Razorback, or just paint up a turret to put on top of one of my Rhinos. Right now, all of my Razorback turrets are assault cannons or las/plas.

Thankfully, I've finished most of my home improvement projects that were eating up my evenings and the summer heat has gone, leaving me time and motivation to paint again.

8.29.2014

Expensive Conversions

This morning I've been scanning around the interwebs looking for examples of reposed Space Marines posted by players on various sites. This was prompted by my experience playing Space Marine on my Xbox the other night. I have been playing a lot of Exterminatus co-op lately, and during a pause between waves I happened to have my Marine standing on a rock. I panned the camera out and thought, "Wow, that would be a great pose for a model!"
My Marine had his arms by his side, with a combat blade in a reverse grip in one hand, and his bolt pistol in another. He was looking sidelong at the camera, with his rear leg up a little on the rock, while the front leg was extended to the ground. I wish I knew how to take screenshots on my 360 so I could analyze the pose.

Anyhow, I decided that it would be interesting to try reposing some legs and arms to make what will eventually become my Raven Guard Vanguard or Assault Marines. You know, once I finish my Ultramarine Command Squad, and the Vindicator, and the Raven Guard Shadow Captain...

In my searches, I saw some absolutely great work, and some complete butchery of parts. As part of those trends, I saw some nice things done to expensive models, and then some expensive models that were completely ruined. An entire squad of Forgeworld Mk4 Marines sliced up at the joints, and then glued back together with the gaps poorly filled with Greenstuff, or knee plates cut through and not replaced. It's not a new idea. I've seen examples online of people who buy a $400 Warhound Titan and then take a Dremel to it to give it "battle damage" or saw through joints to pose things awkwardly or with massive gaps.

Those are those peoples' models and they're free to do what they want with them. But the question popped into my head "What's the most expensive model someone risked a conversion on?".

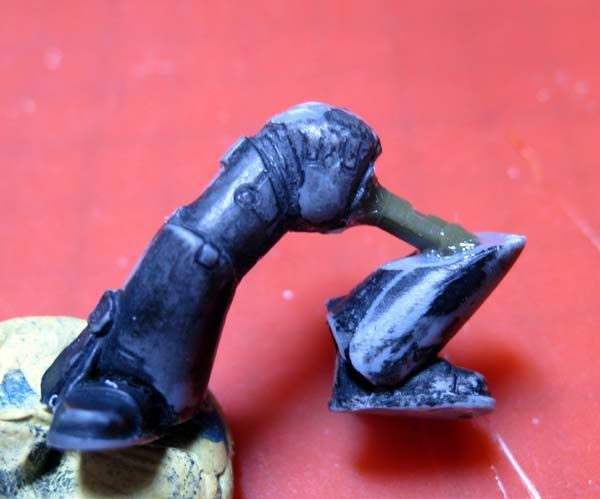
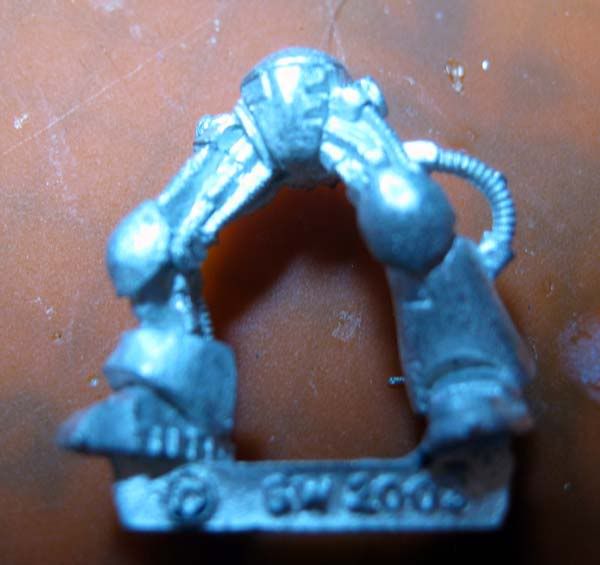
Personally, I'm not a big risk taker with my expensive models. I'm not going to chop apart my Korvydae model to repose his legs. I've also avoided buying the Finecast Lord Executioner model and removing his arms and pads for fear of ruining a $23 model. I've done some small reposing on arms, but that's about it. The only major attempt I ever made at a leg chop/repose was for my old Master of the Forge. I'd originally intended to repose and build him some bionic legs. I started like this, but abandoned the idea when I laid hands on a set of the metal Iron Hands upgrade legs.


Even with the planned Raven Guard reposing, I'm thinking a lot about using salvaged/stripped parts to minimize the bitz cost. This might be a mistake, as a good model deserves new/fresh parts. Marine legs are one of the more expensive infantry bits you can buy, so I'm a little reluctant to invest in a ton of new legs for chopping up (though I actually already have plenty in my bitz boxes).
I've bought some expensive parts for kitbashes, but never for a full on chop-and-slice conversion.

What's the most expensive model you've ever sliced to pieces? Were you hesitant about it, or were you confident enough in your abilities to fix any mistakes?


4.18.2014

And Away We Go...

It's official, the Shadow Captain project is off the ground. I just submitted my order with Fore World for a Captain Korvydae model and the Mk4 Legion Power Weapons set. Expensive!

I bought the power weapon set purely for those old-style lightning claws and the giant chain sword. You see, I really can't stand the current incarnation of lightning claws with their "brass knuckles" look. I can suffer through it on standard Marines and Terminators, but for Raven Guard, I felt they really needed the old school type, because those allow the wearer to open and close his hand. How are you going to perch on spires, climb walls, and otherwise be vertically inclined if you don't have a free hand because you have to hang onto your weapon all the time?

I thought about trying to acquire some of the claws from older GW models, like the Mk2 Veteran or something, but eBay searching turned up nothing, and I didn't want another pile of veteran models hanging around that I'd never use and couldn't sell/trade (seriously, no one wants those any more). If I had bought that set, I was going to try to get a hold of the loose claws from either of the Tartaros Terminator upgrade kits (here and here), and put one on the back of that powerfist veteran's arm. I even thought about grabbing the claws and adding them to the back of plastic powerfists, but by the time I did that, I was better off buying the already-built claws, and it would turn out cheaper!

More than likely, I'll end up reselling all the rest of the Mk4 Power Weapons kit to recover some of the costs. While the power weapons are neat, I have more than enough plastic versions to cover my needs. If you'd be seriously interested in taking the rest of the kit off my hands, leave me a comment and we can haggle about it.

The important thing is that I finally made up my mind on how to build the model. I've spent untold hours looking up possible conversions for the claws, examining possible ways to build the model by reposing plastic parts, and potential poses. In the end, I just wasn't confident enough in my current abilities at sculpting and altering models to pull off what I wanted: a nicely detailed model that I can spend some serious time painting.


4.08.2014

Picking Parts

My drop pod now has a midtone coat on the doors, but because I don't have pictures, I won't get into detail about it. However, I think I might have discovered one of the culprits in my poor metallic coverage...my brush. I use a red sable #2 brush for larger areas right now, and the bristles have gone a little stiff of late. It's leaving streaks in my paint, and not just in the silvers. It happened to the blue last night as well. Looks like it's time to buy a new brush for tanks and pods. I run through size #0s for infantry at a regular clip, so I shouldn't be surprised that the brush I've used for tanks for so long is dying. I can try applying a ton of conditioner and cleaner to it, but I'm not sure it'll work.

I've started planning parts and bitz to make up my Shadow Captain. I've done a lot of Google searching for inspiration and come across some neat ideas and some interesting obstacles.
The first thing I want need to decide is how the Captain will stand out from his subordinates. In the past, I've made mistakes when putting together leader models. I tend to make them too plain and they just blend in to the crowd.
But for Raven Guard, I wonder if that's a bad thing. Ultramarines wear a lot of decorations. Banners, ropes, chains, icons, seals, and other gubbins. I figure all that crap banging around makes a lot of noise. Noise and Raven Guard don't mix. Also, long tabards and purity seals have this tendency to get sucked into the intake of a jump pack or wrapped around an arm or leg. So none of those.
It looks like I'll need to use flat decorations in order to differentiate my Shadow Captain. Things that are sculpted onto the armor, as opposed to attached to it.

With that theory in mind, I picked out a couple of models I might like to use as a starting point. First you have Captain Korvydae from the Forgeworld line. He's got a minimal amount of junk on him, just one rope and badge, a couple purity seals, and a short leather strap belt thing. From looking at sprues, his body and legs are one piece, with his head separate, and his arms in three parts without removable shoulder pads. He sports a very cool jump pack as well. I'd discard the head and arms though, as I'm not a fan of that face, or the thunder hammer armament. I could always use them on another model. At current exchange rates, he rings up at just under $30, which isn't bad when compared to the next model I'm looking at...

The Lord Executioner from the Masters of the Chapter line. I've wanted this model since it was released, but it poses some problems. I really like the head, pack, and body/legs, but that iron halo has to go. Thankfully, it's separate from the jump pack and can be left off. The major problem is that his arms are sculpted on from the shoulder to the elbow/wrist. If I use this model, he's stuck with the power axe. I haven't decided on armament yet, but I'm leaning heavily towards the iconic double lightning claw setup.

Speaking of double claws, I do have the old Medusa V Limited Edition Captain Sicarius model, but I'm very, very hesitant to mod that model in any way, since I know I'll never own another one. (I've owned two, one of which was damaged by someone modding him into another chapter, so I sold it. I've fallen ass-backwards into several copies of some of the more valuable limited edition Marine models, like the Army Box Captain with the horsehair crest).

The final option is to buy the new Vanguard Vets box and cobble together a model. There are some nice pieces in the kit, and I know I'll eventually use all the parts in one project or another. They just don't have the level of detail that the Korvydae or Executioner models have.


4.04.2014

More Glamour Shots

I snipped some of the bare heads from the new Sternguard kit, and did some test fits for my Champion. As a reminder, here are the two finalists from the previous batch of heads:


And here are the candidates from the Sternguard box:


Not a huge fan of the bald/bionic one or the mohawk one. The mohawk head looks a lot like a guy I was in the marines with, who always cut his hair in a "horseshoe" cut and was a general jackass. lol. The bald head is too mature for the persona I've given this model. I really like the final head, as it displays a fierceness without resorting to the "show me your war face" route. What do you folks think?

I also took a quick shot of the fin assembly of my drop pod, to see how it looked on screen.

I discovered that I am NOT  a fan of painting large, flat areas of metallic colors. It's damned near impossible to avoid brush strokes and pooling. There's two coats of my darkest silver color, a wash of Badab Black around the edges, another coat of the darkest silver, and then two coats of my mid-tone silver. And you can still see streaks and lines! The Dullcote helped a little, but I really need to find a way to paint big, flat silver surfaces. Any tips?

3.25.2014

He Is the Champion, My Friends

I'm lining up additional projects beyond my drop pod, and one of those is to build a Command Squad on foot. I'm modeling the Champion right now, and here are a couple in progress shots:


Yes, that appears to be a cat hair across the lens in the first shot. Damn cat. He's supposed to be in a shield guard stance, with his blade waiting for the opportune thrust or stab. It looks awkward from the side, but I like the look from the front. I ended up using a pair of Rhino gunner arms for this model. The shield arm has the gunner hand cut off at the wrist, a bolt pistol added, and then the shield pinned to the pistol and arm. The sword arm is the gunner arm, hand removed at the wrist and replaced with a power sword from the Assault Marine box, and then drastically rotated. I then had to pin the shoulder joint at an extreme outward angle and will fill the soft armor joint with Greenstuff. I triple checked to make sure the shoulder pad will fit on that side, and still leave room for the backpack. I ran into that issue with my Honor Guard models, and so I'm learning from those mistakes.

The big decision I have to make is regarding his head. I want the model to have character, and look stern and menacing. Sort of a "give me your best shot" look. I wasn't sure if a helmeted head would convey that properly. I grabbed a bit of poster tack and did a lineup of possible heads:


I skipped any heads that had rebreathers, as I felt those really didn't convey anything at all. I do actually like the helmeted head I selected, as well as the head in the fourth shot. The first Blood Angel head (fifth picture) is growing on me, but I'm not sure if a screaming head really conveys the vibe I'm after. The final picture is subtly different in the expression than the fifth, beyond the bionic eye. It looks more like a "Nooooo!" face than a "Raaaar!" face.

What do you folks think? Any heads you like or hate? Do you think the helmeted head will convey a feeling from the model? I do have to crack open my Sternguard box again and check those bare heads, but I'll use another post for that. I plain forgot.

Also, point of trivia: the heads from the old kits have much larger ball joints at the neck. For the first three bare heads, I'd have to trim that area down to make it look right. Not a big deal, just interesting changes to model kits over time.