3.31.2015

Raven Guard Scout WIP Post #3

My progress on these Scouts is still slow, but it has ramped up quite a bit. I've had to accept the fact that I am simply flat out terrible at step-by-step updates. I'll have to content myself with incremental updates. So, here are some incremental updates!

In my last post, I had applied the basecoat of Grey Liner to all of the armor parts. The next step was to wash it all down with Badab Black. You can see the wash is still wet in this image:

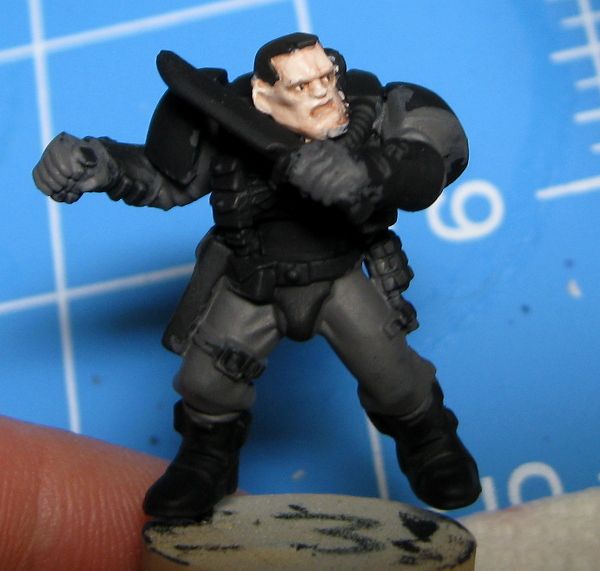
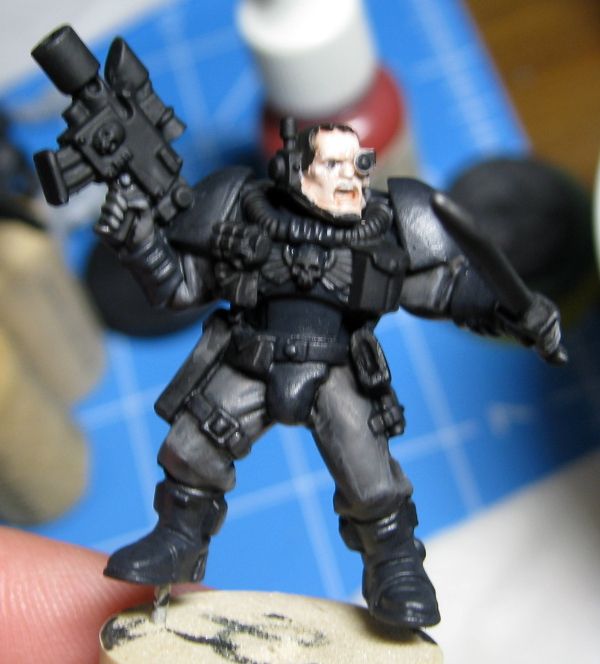
It doesn't bring the armor all the way back down to pure black, but definitely provides some darkening effect. After the wash was dry, I went back and applied edge highlights with Shadowed Stone, and then ever so slight touches of Stone Grey (those are Reaper MSP colors). Next was the pouches/holsters/straps. The color below is MSP Ruddy Leather, washed with Devlan Mud, and then brought back up a bit to Ruddy Leather, and a very light touch of Leather Brown on all the panels. Then, I hit the chest armor with plain grey, and then white. The grey is lost in this image because of the bright light. It didn't look quite right in the end, so I eventually washed it in thinned Badab Black and went back with the white again.
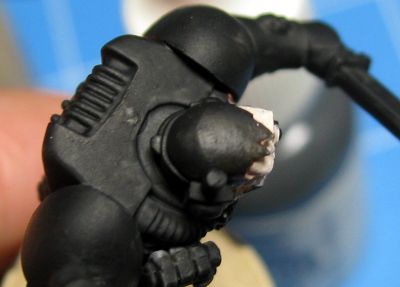
You can also see in the shot below that the chest armor is messy, especially at the left side of the skull, lower right wing, and the right side pouch lids. I'll go back and touch all those areas later. I like to do my cleanup all in one go at the end.

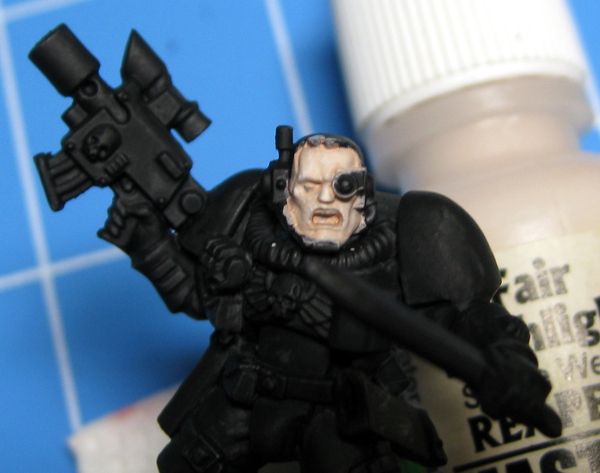
The next step was metals. The shot below is blurry and a bit of a poor example because the Marine only has a knife. I just applied Leadbelcher to everything, washed with Badab Black, then touched it all with Ironbreaker. The exception is the flats of all the combat blades. I left those dark, and applied brighter metal colors to all the cutting edges. It's a neat contrast effect.

I also started working on the bases for the models. Because every model will be on a 30mm base, and I had to bitz-buy the ten bases I have, I wanted to try making castable bases. However, my big problem with resin bases is that you only have so many designs. If you buy one of the beautiful sets from Secret Weapon or Dragon Forge Design, you're limited to the 10 or so bases they have. I didn't want to be limited in that way, so I decided to try casting "minimum detail" bases. Instead of adding all the sand, rock, and other decoration on the master base, I am just building the basic floor section and adding all the sand and deco to each cast afterward. That way I have a quick, easy startup but a lot of individuality in the end.
I wanted a broad stone paver design as the underlying detail, and then I can add sand and vegetation over top of it. To that end, I got out a bunch of scrap plasticard I had squirreled away, and used a rotary paper cutter to score it into 1"x1" squares. I will then carve the edges of each square a little to look like chiseled and worn stone, and arrange them on the bases. It's a technique I stole and modified from Grubnards at the Mandulian Chapel.

By altering the location of the four stone corners on each base, and then rotating the eventual casts by any of 360 degrees, I figure I can produce an unlimited number of similar-yet-unique bases from five or ten masters.

In regards to non-Raven Guard projects, I've also made some good progress on my Ultramarines Librarian, though I didn't take any pictures. I'd say he's about 95% done. I need to find a good jump pack for him. Right now he's only got his standard power armor pack, but I magnetized him to accept a jump pack. I'm looking at the plastic Vanguard Vets packs, a Finecast version of the previous VanVets packs (I have them all in metal, but that's FAR too heavy for 1/8" magnets), or even something from the Blood Angels range. I can't decide if I like the Sanguinary Guard jump packs with the wings left off. Anyone know if the gap left over from leaving the wings off is very noticeable?

My drop pod sits, incorrectly magnetized until I decide to order some new 1/16" magnets to fix it. It's a low priority. I've not touched the lascannon Marines beyond assembling them and picking their bases.


3.24.2015

Help! Help! I need ideas to fix this...

I finished building and magnetizing my second drop pod last night. My first one went off without a hitch, following Ron's tutorial over at From the Warp. For this second one (a Forgeworld Deathstorm with missiles), I got a little cocksure and didn't double-check the steps of the tutorial. I realized once I'd glued the doors to the bottom hull that I'd placed the magnets in the doors too far back. As a result, the pod now stands with all the doors open about 30-40%, instead of firmly closed. In short, it looks stupid.

Can anyone think of a way I could fix this? The problem lies in the magnets in the doors, which are now inaccessible because the two halves of the bottom hull are glued together. I need to either move the magnets in the doors, remove the doors and replace them, or nullify the magnetic pull between the magnets in the doors and those embedded inside the bottom hull section. I need some way to hold the doors fully shut. Once they're opened, the model is just fine. I just can't put it on my army display tray looking like a half-opened flower.

Ideas?

3.13.2015

Raven Guard Progress Dump

I've made some good progress on my Raven Guard Scouts, but unfortunately I did a really poor job of documenting the process. So, this post is more of a photo dump with words. With that warning out there, here are some pictures:

I continued working on the skin from the prior posts. After the thinned down Ogryn Flesh wash, I went back to Fair Shadow, then to Fair Skin, and a final touch of Fair Highlight. After those were try, I spot-touched again with Ogryn Flesh wash, thinned to an almost transparent look. Unfortunately, I am far too lazy to set up my light rig for WIP shots, so the whole effect is washe dout by my bright painting light.


After the skin was done, I put a coat of Brown Liner on the hair of each Scout. Reaper's MSP "liner" colors are near-black shades that were designed for dark-lining fantasy gaming models that have alot of material transitions. Honestly, I think it's a technique that's dying in the wake of easy washes that pick out detail withmuch less effort. But, I still have the Grey, Brown, and Blue versions, and the Brown Liner makes a nice base for dark hair. I'll go back later and lightly add lines to insinuate the hair texture. Basically, you rapidly paint a series of pencil-thinlines in the direction of the hair "flow" and then lightly wash over them to dull them down some. Depending on your monitor settings, you can see the difference between pure black of the primer and the brownish black of the liner paint.

 
The next step was the cloth, which I base coated using MSP Shadowed Stone.


I then applied a liberal wash of Badab Black to darken things down. This picture also shows the rudimentary eyes painted in. I am terrible with eyes, which is a bit of an obstacle for a Scout-heavy force!

 
After the wash was done, I went back to Shadowed Stone, then rough highlights with Stone Grey, and then very thin and sparing highlights of Weathered Stone, as it's a very light grey compared with the others. I tried a strong highlight initially, but it made it look like the model was wearing pants made of Siberian Tiger skin, lol.


I am now at the hard armor stage, to which I applied a basecoat of MSP Grey Liner. As you can see, it's a near-black grey color, and it makes a great base for black armor. If I'd started with pure black as a basecoat, there's only one direction to go...up. Highlights only. But by starting with Grey Liner, I can go both directions, up and down. I'll apply a wash of Badab Black, and then highlight upward with a mix of Grey Liner and Shadowed Stone, then refined highlights with Shadowed Stone and maybe Stone Grey.


Progress has been nice and steady on these models, but I'm stumped on the next step, the chest decoration. GW likes to paint Raven Guard with a lot of white on them. I've never been a big fan of that idea. Why put a ton of white on a Marine whose specialty is ambush and infiltration? Sort of gives away your position, you know? I cannot decide if the chest decoration should be a light grey, a dark grey like the pants and arms, or a silver metal color. What color do you think would fit? Keep in mind that my gun casings and frag grenades will be Caliban Green, kraks will be red, and pouches will all be a dark brown with silver fasteners and buckles. There will be NO gold on these models.

What color would you paint the chest decorations, keeping in mind the above and the fact that whatever color I choose will also carry over to the power armored models?