4.29.2015

Raven Guard Scout Squad, Work Complete

After some solid paint sessions, my Raven Guard Scout Squad is now complete!


My only real disappointment with this squad is the sergeant's face. He's got some sort of Popeye look going doe to that one poorly painted eye. I also need to look again at the model, because the picture shows a big splotch of blue on his chest, which I don't remember seeing.

Other than that, the squad was a lot of fun to work on, and I learned some new stuff. Decals and decal solution, gloss varnishing, casting bases, and more work on painting faces.

I'm not sure exactly what is next in the Raven Guard pipe. I have parts set out for both a Librarian and a Captain, but I can't decide which to build. I'm stuck on the Librarian because I can't decide if I should stick to my original plan of replicating this guy from some older art, or just go freeform with him.

As for the Captain, I can't decide on armament. Originally I'd intended to build him as a Shrike stand-in with dual lightning claws, but then I realized that Shrike is a bit of a lame duck in 7th. So, I thought about a different loadout of thunder hammer and lightning claw. Looks cool, and is pretty in-game effective. But then I compared him to my potential VanVet squad who'll likely be packing bolt pistols and grav pistols (Gunslinger rules), and he doesn't really match what would be his de facto command squad. I could give him double pistols as well, but then he's pretty pointless in melee where Captains tend to shine. Any suggestions?

I'm stumped at this point. I have time to think about it, as I have a few Ultramarine projects to work on. I have three lascannon Marines in progress, and a drop pod waiting for magnets to arrive in the mail to fix my mistakes. I also want to expand my heavy weapon options for my Terminator squads to include Cyclones and heavy flamers.

4.26.2015

More Raven Guard Scout Progress...So Close!

Here's a series of images that show my progress on the Raven Guard Scouts.

This image is washed out and terrible, but you can see the glossiness of the varnish I added to the shoulder pads. I'm told it's a key step in laying a foundation for decals, so I applied it to the shoulders of every model.

Once that was dry, I started applying decals. I used Micro Sol and Micro Set to get them nicely adhered. The first I applied didn't go very well, as I mixed up the order of the solutions. You want Set, then Sol. Set makes the area tacky so the decal "sets" in place, and then you use Sol to soften the decal to conform to the shape of the piece. It's a SOL-vent. After I figured that out, the remaining decals went quick and easy.

I used the Forgeworld decal sheet for Raven Guard, which is absolutely fantastic. I'd say you could probably do an entire army with a single sheet.

I then set the models aside after giving them a quick blast of Dullcote to lock down the decals, and proceeded to work on making a mold for my custom paver/flagstone bases. I dug out a very old canister of mold silicone. I'd had the kit for something like two or three years, and the canister was half full. When I went to use it, I realized it was probably no good because the silicone was very thick and goopy. Proper silicone is thick but flows easily. Being the cheapskate I am, I figured I would give it a shot anyways and mixed up a batch.
Turns out I was right, the stuff was too far gone. It refused to cure after three full days. Uncured mold silicone is just about impossible to remove from anything, so I had to throw the mold box, the acrylic sheet I'd glued it to, as well as four master bases in the trash. Here's a pic of the whole disaster before it went in the trash. The bases sticking out of the top were actually pulled free from the hot glue I'd used to fix them to the acrylic sheet because of the air bubbles underneath!

I thought about giving up on making a mold, as I wasn't sure I wanted to spend more money on more silicone. But, I gave in and bought more. This time I bought Alumilite Quick Set, where in the past I'd used High Strength 2. The Quick Set cures more rigid and less squishy. HS2 is more for one-piece molds with big undercuts, while Quick Set is for two-piece molds and one-piece molds with no undercuts.

I got my shipment in less than a week, and poured a mold over four of my masters. The result? Success!

One thing I'm a big fan of when I make molds is recycling. In the past, I'd saved small spills and sections of cured silicone and added them to my new molds. Silicone cures solidly to old silicone, which is why you need mold release agent when making two-piece molds. But I wasn't sure if Quick Set would bond to HS2, so I didn't include any recycled chunks in the master mold. Instead, I sliced off a couple pieces of an old HS2 mold and put them in the bottom of some plastic cups. I poured the leftover Quick Set into the cups to see what would happen. Turns out they bond nicely! I can now use chunks of old molds to save volume when pouring new molds. I even added these two little experiments to my pile of old silicone for chopping up and inclusion in new molds down the road.

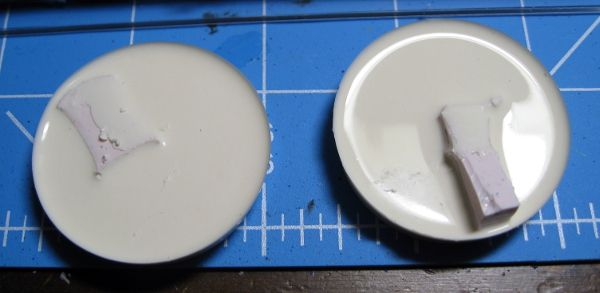
My first pour into the new mold wasn't great, but it wasn't a total failure. Below you'll see four bases. The top right contains a lot of unmixed resin, while the top left contains a little less. I didn't spend long enough stirring the bottom of the cup. The two casts on the bottom came out perfectly, as they were the first ones poured from the cup.

 After another mix and pour, I had six usable bases and two failures. Here are the five for the Scouts:

Because pure, flat bases are boring, I got out my tubs of sand and small rock and added some to each base to make them look like small rubble piles.

These will then be primed white and painted a stone grey color. You'll notice the bottom left base has a small notch out of the largest tile section, at the bottom. That was an air bubble from the casting that I carved the edges of to make it look like wear or damage. You don't have to worry too much about bubbles on bases of this style, since you can just cover them up with sand and rock, or expand them into cracks or damage.


4.24.2015

Epistolary Librarian Laetus Falco

A little while ago I finished my Ultramarines Librarian, but wasn't able to get good pics until last night. So, here he is, along with his fluff:

Epistolary Librarian Laetus Falco
From his induction into the Librarius of the Ultramarines, Laetus Falco displayed a penchant for using his powers to unlock the physical and psychic potential of his battle brothers. Those Marines who go to battle beside the Epistolary find themselves possessed of great strength, unassailable mental fortitude, or able to endure or recover from the most dire of wounds.
As a Codicier, Falco was able to use his powers to keep his mentor alive long enough to banish Nodosus, a greater daemon of Nurgle, back to the warp. Falco's mentor died shortly after, but lived long enough to pass his force staff, Reach of Empedocles, to Falco. He has carried it ever since.


I used a darker blue for his armor, since the Codex Astartes indicates that Librarians are marked out by a deep blue. I use a lighter ultramarine shade for my army, so I just stopped one shade darker. You can see the difference in the second picture that shows the shoulder pad with the Chapter icon on it.
His backpack is magnetized so I can swap in a jump pack if I want.

This was a fun model to paint, and I'm really enjoying all of the new clam pack characters GW releases. I'm thinking about painting the Reclusiam Command Squad Chaplain next, after I've finished all the other Ultramarine models in my queue.

4.14.2015

Just a quick redesign...

Last week, I read Thor's article on HoP about writing articles and successful blogging. One of the points that I focused on after reading was knowing what your blog is supposed to be about. So I thought about it for a while.

I'm not a tutorial guy, as I tend to progress too quickly in my work to stop and document it. I'm not a batrep guy, as I can barely remember the turn-by-turn of a game ten minutes after it's complete. I'm not a tactics guy, because I think a lot in Theoretical, but rarely transition to Practical (yes, I did just finish Know No Fear last night, why do you ask?).

This blog is more like a personal journal and scrapbook. I don't have a large readership, nor much engagement, and that's fine with me. It's really just a spot for me to pin my projects so I and a few others can look at them later on. It's also a spot where I can centrally access the blogs I follow on a regular basis instead of using browser Favorites. The blog is sort of a personal Instagram/Pinterest thing.

So, I decided to organize the blog layout around that knowledge.
I changed all the colors to a more work-friendly layout, as black backgrounds and teal lettering scream "not work related!" to passers-by of your cube or desk.
There is also now a series of Completed Projects links across the top of the page. For now, it's limited to Ultramarines and Miscellaneous, but I'll add Raven Guard later. If anyone knows how to make Blogger turn those links into dropdown menus that lead to separate pages, please let me know. Once I get more completed projects up, I'll need a less linear way of navigating from project to project. For example, on the Ultramarines link, I'd like to have a dropdown menu for the Command Squad, and another for my upcoming Librarian. I'd like to split Miscellaneous into Tyranids and Assassins.

So the blog should read more like a journal and photo album now, as opposed to a chronological line of brain spew.

4.06.2015

Raven Guard Scout WIP Post #4

More solid progress on my Raven Guard Scout squad. In fact, all of the painting on them is now done! Here is a final WIP shot of painting on one of the models:

This was the addition of Caliban Green on the gun casings. I really like this color here, as it breaks up the sea of black. It'll be even more apparent on power armored Marines, since those guys will have no grey pants to break things up. I'll need to rely on pouches, grenades, and gun casings to break up the black and silver.

An example of a couple final shots:


I really like the Caliban Green on the shotgun. I forget what the green I used for the edge highlights was, but it was a Reaper MSP paint.

I also made some serious progress on my base masters for casting. I took all of the 1" squares of plasticard I'd cut out, and carved a rough bevel into each edge. When I had four squares, I'd slather the base in plastic glue and randomly stick the first square on the base. Then it was a matter of sticking the other three on as well, pressing very firmly, and then  letting them dry.

Once the glue was fully cured (wait at least 24 hours), I flipped the base over, and used my X-Acto knife to score the plasticard around the top of the base. You have to be careful not to slice off pieces of the base itself while you trace around, and also be careful that you don't press so hard that you break the knife blade. One or two passes around are plenty, and it doesn't need to be perfect. It all gets cleaned up at the next step. Once the pieces are scored around the base top, you can just snap the plastic off of the base. Don't throw out the pieces you snapped off!

It's not really visible in this picture, but the next step is to go around the newly-snapped card and carve bevels into it in the same way you did when making the squares in the first place. Again, be careful not to slice the black plastic of the base and take the opportunity to cut away any glue drips that got onto the black plastic. It'll reduce the amount of filing you'll do on the final casts.

Now, for the second base, take those pieces you snapped off and use them to make another pattern. I like to randomly select one, glue it down, and then arrange the other scraps based on its position. It keeps things reasonably random. I don't want all of my bases to be perfectly lined up with the center of the stone seam in the center. That'd be pretty boring.

I repeated this process until I'd made five base masters, and since then I've made three more. I stopped at a total of eight because I only had ten bases to work with, and wanted to save a couple for backups, plus I wanted to save some of my card squares to make some 40mm bases for Terminators someday (Raven Guard actually do use Terminators, not just Assault Marines and Scouts!).

The next step is to check for any fine seams under the stone squares that the silicone for the mold might get into, seal them up with glue, and then get to casting.

In other projects, I've finished painting my Ultramarine Librarian. However, he's still in pieces as I haven't glued all the subassemblies together. Once he's done, I'll set up the lightbox and get pictures taken. After that, I'll mount my lascannon Marines for painting and get started on them. I'm hoping to paint them in a batch, but if they won't hold still in the mounting corks I'll have to paint them one-by-one.

4.03.2015

Scrapwing?

I have pictures to share of my painting progress, but unfortunately/fortunately I wasn't able to pull them off the camera last night because I was busy negotiating to sell my house.

Instead, I'm going to ramble on about yet another project I'd love to do if I had the free time: Scrapwing.

What's Scrapwing? Well, it's this idea I have where I buy a unit of used Terminator models one at a time on eBay or Bartertown, strip them down to plastic/metal, and rebuild them into a Deathwing force. Deathwing from scrap models = Scrapwing.

I like to pride myself on my ability to rehab old models. There's a significant percentage of my Ultramarines that are made from pre-owned models or pre-owned bitz. Building an entire Scrapwing army would be neat, but it's not a project I'll actually tackle right now.

Why not? Well, here's where I ramble. The reasons are twofold:

1) Time. This is the big one. I'll be moving soon, if all goes well. Once that happens, I'll be up to my ass in farm work. I forsee a lot of my painting being done in the winter.

2) Money. Honestly, I'm not hurting for hobby funds, and if I were buying secondhand models and repainting them, things would be even cheaper. But the part that doesn't make monetary sense is the comparative costs.
You see, GW has been putting out some very good box set bundles and campaign sets. Dark Vengeance is a great starting point, and I'd likely pick up one set of the five Terminators in that set to start the project (if I were actually to do take it up). Right now, you can get a full set of the five DV Terminators for about $10-15. That makes each Terminator cost about $2-3. A multi-part model from any of the Space Marine ranges is $5 or $6 (for Chapter-specific models). So the DV models come in at less than half of a retail Terminator. Not bad, but you don't want to build a whole army from the same five models!
You can land used squads of various Terminators for anything from $10 to $100. These are typically someone's old Black Reach models, or poorly painted/assembled normal Terminators. Prices vary wildly based on the seller. You even have sellers hawking squads of old, metal Terminators in various states of paint and assembly for foolish prices. The more times the words "vintage" or "OOP" are used in the title, the more outrageous the price.

And then there's the seller I found who's been selling five-man, multipart Terminator squads for $25 shipped. It's the torpedo that sinks the Scrapwing boat. Tons of half-price, multipart Terminator kits are available for less than the cost of USED models. These are all being sourced from the Shield of Baal: Deathstorm box set.

Why, other than to be quirky, would you spend MORE money on used models to create a Scrapwing army when you can spend LESS money on brand new models? It's sort of a funny state of the game right now, with GW's awesome bundle deals in the form of campaign sets.