Here is Thrax Gaios' back story:
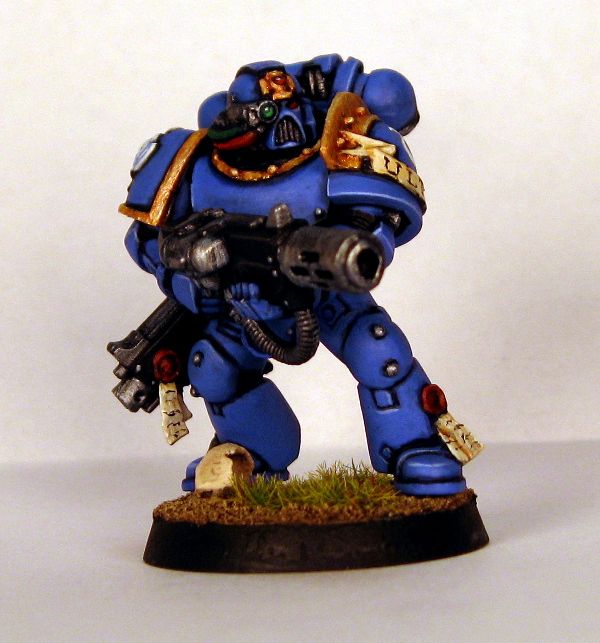
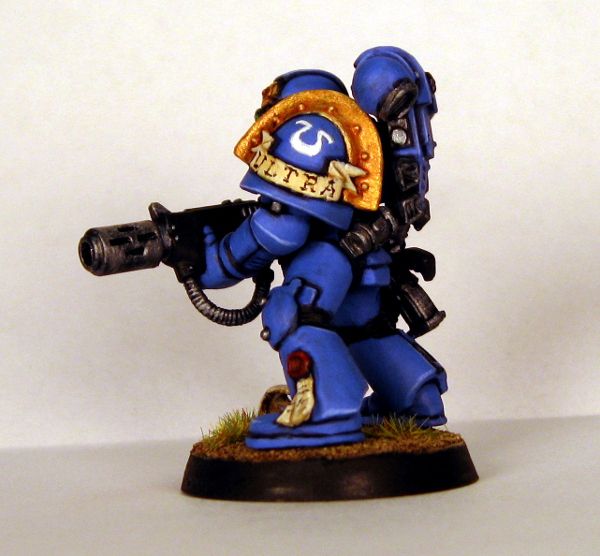
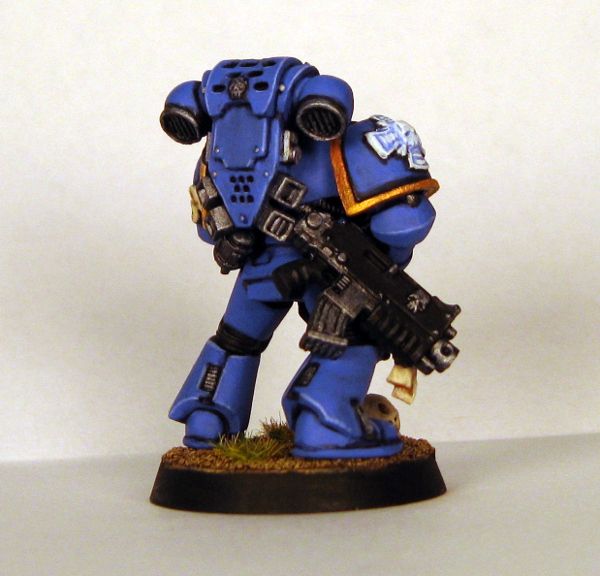
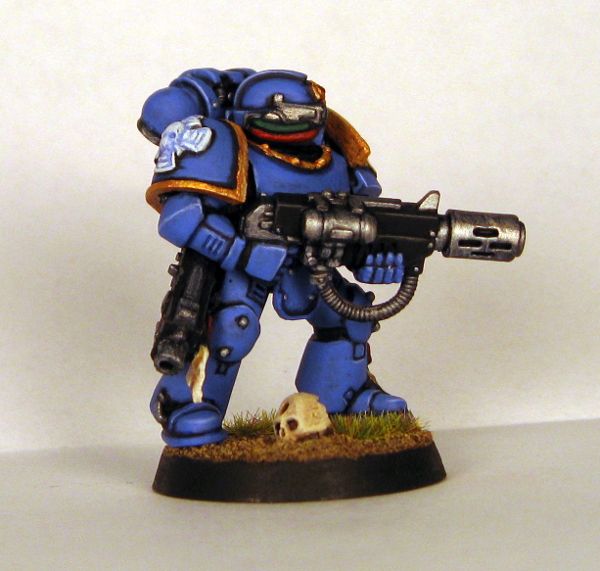
Veteran Brother Thrax Gaios is the squad's demolitions expert. He carries a meltagun, his bolter, and a satchel of meltabombs and grenades. He can toss a krak grenade into the vision slit of a moving tank at a hundred meters. Where the other squad members wear armor featuring ornate designs and decoration to reflect their veteran status and membership in the Command Squad, Gaios wears bulky, reinforced armor with little adornment. Because his armor is so often dented and scraped when he stands in the blast wash of exploding enemy tanks and fortifications, he has opted to forego ostentation in favor of smooth lines and heavy plating.
And here are the pictures:
Now that he's done, I've only got one squad member left. The Apothecary's bodyguard. He's largely bionic, so I used as many bionic bits as I could on the model. I forgot to take a picture of his body, but here is his head so far:
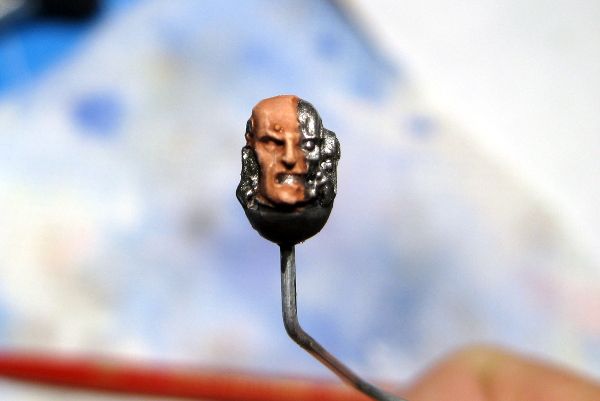
Pretty simple bionic head. The skin is done, but the metallics are not. The rest of him is made from GW parts with Kromlech legs. I'll get a shot up in the coming days.
While waiting for Dullcote to dry, I also started plugging along on my Vindicator. Here's a quick, largely uninteresting shot:

As of this morning, the blue is about 90% done. I decided to try a different technique for painting vehicles. Instead of painstakingly applying each layer, leaving careful shade lines as I go, I decided to paint each layer quickly and thoroughly, and then apply the shading with a wash of my darkest color. If it turns out right, it'll save me a TON of time when painting tanks and pods.
There is a bit of bad news to go along with all my painting progress. Yesterday afternoon, while scrubbing mold release off my Forgeworld Raven Guard Captain Korvydae model parts, I dropped one of the fuel lines for his jump pack down the sink drain. I soak my FW resin parts in Simple Green, which is a great degreaser and perfect for cleaning resin. Unfortunately, the dissolved mold release makes the parts VERY slippery. I thought to myself "I should probably close the drain plug for this." I decided that I was almost done, so didn't bother. Fate punished me by sending that little pipe part squirting out of my fingers and right down the drain. ARGH! If anyone knows where I can get another fuel line for that kit without buying the whole thing over again, or has an example of rebuilding the line from other parts, I'd appreciate it!
In general gaming news, it looks like GW is revamping the base sizes for models. 32mm bases are up for preorders, with all of the new Blood Angel reboxings and kits having new sizes. I do like the idea of added space for posing Marines, but not the idea of buying scads of new bases at fifty cents a pop. I'm not hurting for hobby funds, I just hate spending money on simple pieces. I'll wait to see what the reasoning behind the bases is before jumping in. The timing is fortunate for me though, as I'm just about to start assembling and posing Raven Guard models. Id 32mm is standard for Marine infantry, that gives my Scouts, Assault Marines, and Jump HQs a lot of space to work with. One of the basing ideas I had for them was a desert city ruin with small tumbles of bricks and broken walls, but that is largely lost on 25mm bases. 32mm would give me room to stack bricks, sculpt pavers, and add little windswept sand piles to the debris. I'd wanted to jump right in to the RG models, but new bases put a little delay in the process. I have plenty of Ultramarine tanks to paint while waiting though.
Your vet came out well. He's simple but that's why he looks the part.
ReplyDeleteThe vehicle wash method is what I do and it really speeds things up. I do it on all my models anyway, base coat then shade with wash, but on vehicles it's where you'll see the most impact for speed. If you do it carefully enough then there's very minimal cleaning up you have to do but even the time taken to clean up some slips is still going to be less than your standard method.
That's some shitty luck on losing that part :(
Thanks. He was interesting to paint, despite being very plain.
DeleteI had this premonition I'd lose a part down the sink, but ignored it. I thought about trying to cast one from the remaining line (they're identical), but don't think I'd be able to get a mold to fill properly. The other option is to try to find some wire or plastic rod of the same thickness and replicate the line (it's a super simple part). Or, I can try to make a whole new set of lines using some of the pewter cables I have from Dragonforge.
on the brass etch i read or heard someone the trick is to use elmers/pva glue gives you the stick and the time to move stuff around then you just mop up the extra, I haven't ever tried it though.
ReplyDeleteHmm. I will have to try that. I'm guessing the primer and paint make it pretty permanent.
Delete