The first step I take is assembling models. I tend to assemble as much of the model as I can before priming and painting. For basic line troopers and such, I'll assemble everything but the backpack, and leave some of the obscured areas basic primer or shade coat colors. You can't see behind the bolter held tightly to the chest, so leaving chest armor in your primer or base coat colors typically won't sink your quality of painting.
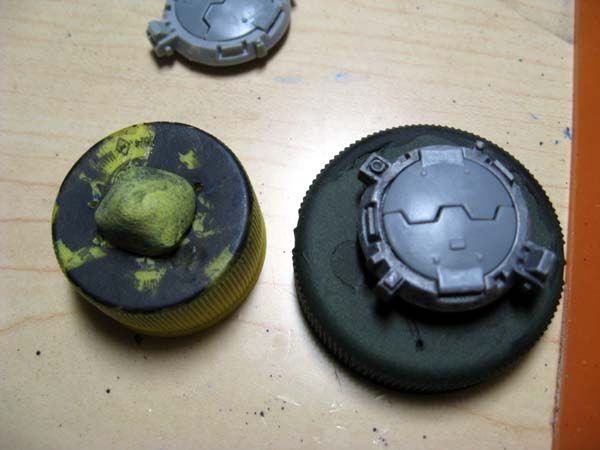
After assembly, I mount my models for ease of handling. For this example, I'm working with a couple tank hatches and a pair of Black Reach Terminator storm bolter arms:

The hatches are fiddly to handle while painting, unless you have long fingernails or something. Normally, I would assemble the storm bolter arms to bodies before painting, but these will be used in an upcoming segment or two, so I don't want them glued to a body.
I typically mount flat objects like tank hatches onto a bottle top using poster tack. The example in the link is blue, but mine is yellow. The stuff is great, as it's almost infinitely reusable. One package will last you a lifetime of modelling. Even when you get primer and paint on it, just knead it back into a ball, and the flecks of paint are broken up and mixed into the putty.
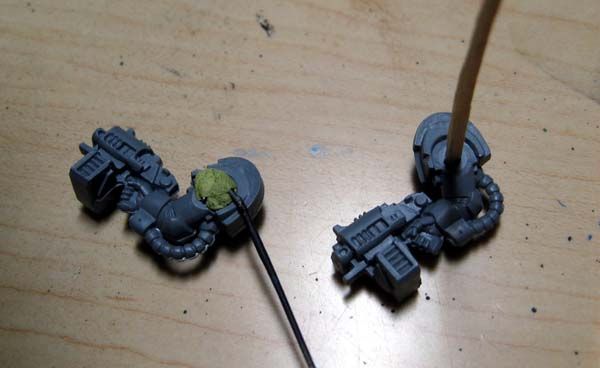
For infantry, I drill a shallow hole in a foot and insert a short length of paperclip with a tiny dab of superglue. (The pictured model is a refurbished plasma cannoneer I'll get to painting some day.)

You then grip the length of paperclip in a Dremel tool or pin vise, or even a power drill. I use an old, burned out, battery-powered Dremel I use to use for modelling, but that no longer holds a charge. (The model here is a primed attack bike gunner for my next attack bike, you'll see shots of this in the near future).
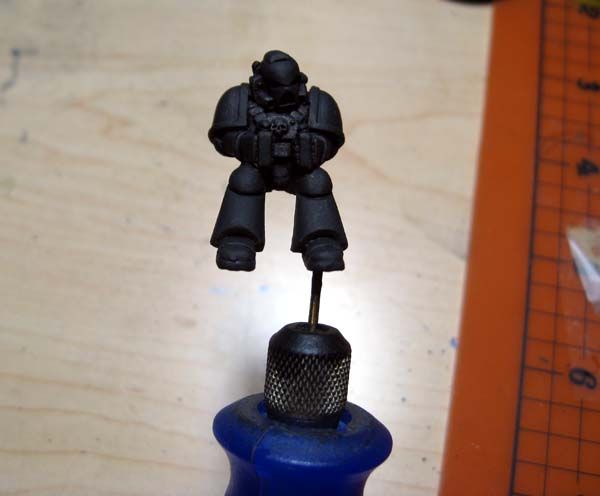
Once you've completed painting, remove the pin from the vice or holding tool, and grab a pair of needle nose pliers. Gently hold the model in one hand, and use the pliers to twist the pin out of the hole. So long as you didn't use a ton of superglue or a really deep pin hole, it will loosen up and pull right out. You can even save that length of paperclip and use it to mount the next model.
What do you think? Do you use a similar method, or something completely different?
The next how-to session will focus on my primer creation and application methods.
I really should do something like this but I guess I've been lazy. I often handle the model/piece and often have to do touch-ups from paint rubbing off or having a little paint on a finger and it coming off on the model.
ReplyDeleteI'm running into that problem with the attack bike I'm working on. Putting a pin in it would have been difficult and unstable, so I'm just handling it by the tires and top, and have lost large patches of primer just from holding the model.
DeleteThe whole pinning process does add time, and makes it harder to batch paint, but I feel the end result justifies the extra time. Of cours,e I don't batch paint at all, so take that opinion with a grain of salt.
Good point on batch painting. I loath doing it but there's no denying it's effectiveness. However, on the one-offs I do like my HQs, elites, champions/sarges, etc., your method would definitely be handy. I'll have to give it a shot next round.
Delete